Generating pix2pix tensorflow images from the web using ImageMagick
pix2pix is a great and easy way to create machine-learning generated images, but it requires specific formatting. This tutorial shows you how to achieve this using ImageMagick.
I’m finally getting some free time to dip into deep learning, and found a great set of guides by Gene Kogan through his online Machine Learning 4 Artists courses.
He’s got a great intro on pix2pix, which became popular through Christopher Hesse’s Sketch2Cat implementation, in which a user can make a line-art drawing and turn it into a TensorFlow-trained full-color cat.

If you want to play around with some examples, the instructions include a way to download a training set of images of building facades, but if you actually want to start creating your own deep learning trained images, you need a way to easily build up a database. There are lots of places these images can come from, and many ways to collect them, such as scraping, but if you are trying to avoid getting too technical, one easy way to get them is via screenshots of image grids from the web.
Generating single images from a grid
Pretty much every stock photo site (unsplash), social network (instagram), photo library (google photos), and open-access collection (MET public domain archive) out there at some point represents their works in the form of an image grid. But getting from that grid of images to a pix2pix friendly image format takes a little massaging.
In my case, I wanted to take some of my google photos of faces, train a model to convert them to faces, and then take some further face photos and see what it came up with. Google photos’ own image recognition software lays these all out in a nice, predictable grid:
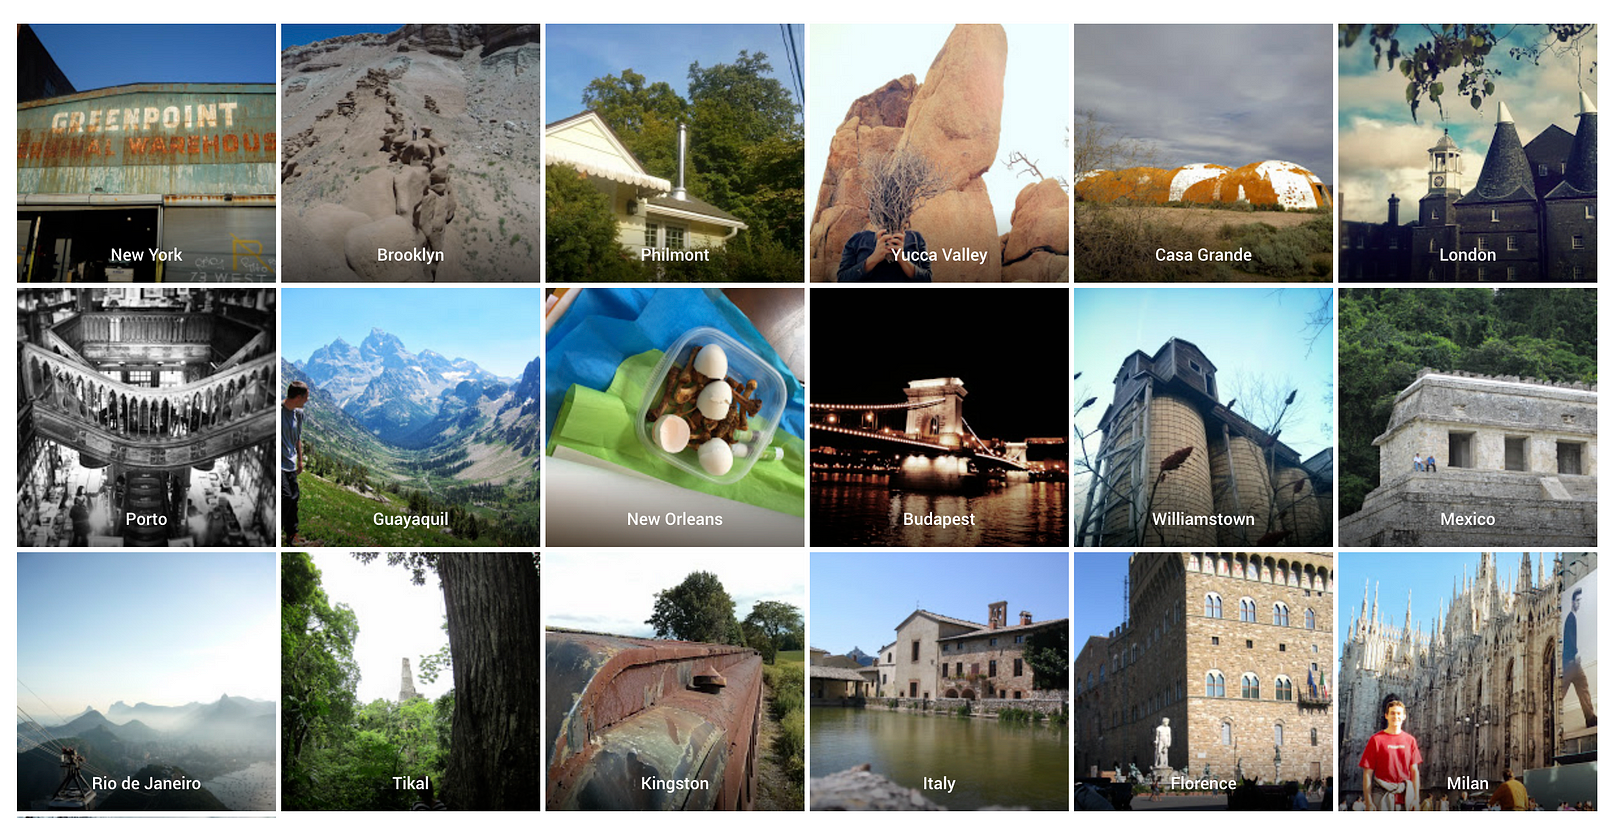
so it was easy for me to just take a screenshot, since I have a lot of images stored on google photos. But now I needed to make each one of these its own image, each image having the same width and height. ImageMagick to the rescue. This tool’s command line interface can do just about anything I’ve tried to throw at it.
The first thing (after making sure ImageMagick was installed) I did was make sure that my screenshot had the same amount of padding around the edge of the images as between each image (8 pixels). So I just did a quick crop in Preview (I’m on a mac).
Then, I ran the image magick command to generate individual images from a grid:
convert image.png -crop 2x3-8-8@ +repage +adjoin tile-%d.jpg
where:
image.pngis your screenshot file name6x3is your grid layout-8-8is the amount of horizontal and vertical padding around each imagetile-%d.jpgwill be the name of each image, with a number appended for each one generated, replacing the%d(e.g.tile-1.jpg)
Generating side-by-side training model images
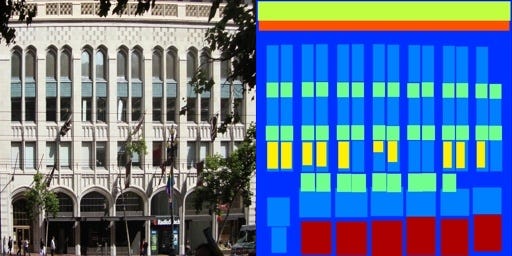
Now, pix2pix wants a model by which to compare all future images, so it wants a side by side example of what it should be creating. The example set contains a set of building facades, and a set of drawings for what a facade is structured like:
We want to generate the same with our faces. So we could run an ImageMagick command to combine our images side by side using a built in tool of ImageMagick called montage:
montage tile-*.jpg -tile 2x1 -geometry 418x418+0+0 multi_%d.jpg
whre:
tile-*is the repeatable name of each image in the directory (e.g. tile-1.jpg, tile-2.jpg, etc)2x1creates sets of images with 1 row and 2 columns418x418is the dimensions of each individual image0+0is the amount of horizontal and vertical padding you want in between each image (we don't want any)multi-%d.jpgis the output file name for each image pair.
Training your Pix2Pix model
Now we can train our model with Pix2Pix. Assuming you’ve gone through all the pix2pix installation instructions and verified your install, run:
python pix2pix.py --mode train --input_dir [tiles] --output_dir [model] --which_direction AtoB --max_epochs 200
where:
[tiles]is the path to the directory containing our images we just generated (can be relative or absolute)[model]is the directory where we want to generate our training datawhich_direction AtoBspecifies that our source image will be on the left, and our training image will be on the right.max_epochs 200is the number of iterations we should run each image through training.
Generating test set images
Depending on the number of images you’re trying to process, this can take awhile, but when it’s done, your model directory will be populated with all of the info it needs to generate new images from a test image set. But first we need to create that test image set.
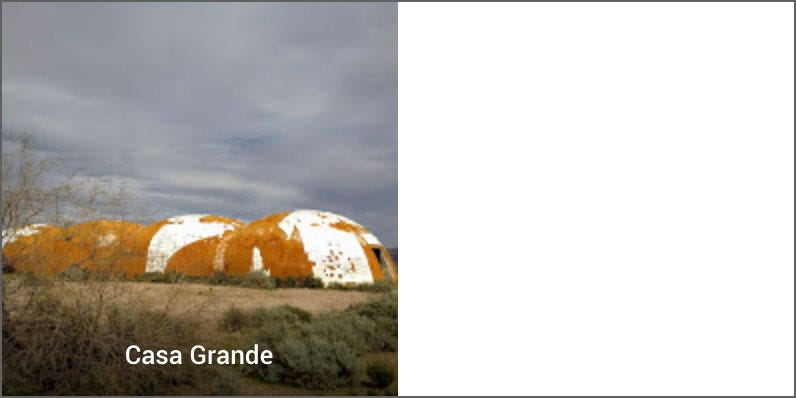
Pix2Pix expects test images to be in the same side-by-side format as before, only with blank white space on the right.
We can achieve this by running ImageMagick’s convert function:
            for i in *.jpg; do
                convert \
                ${i} \
                -gravity west \
                -background white \
                -extent 836x418 \
                $(convert ${i} -format "pair-%t.%e" info:)
            done
where:
i in *.jpgloops through all of our jpg images in order to run imagemagick'sconvertcommand${i}becomes the placeholder for that image path-gravity west \implies we will be expanding our image canvas to the right (our image will be on the left / west side-extent 836x418 \gives the final desired dimensions of our images (418x2=836 pixels in width)$(convert ${i} -format "pair-%t.%e" info:)runs the actual convert command, generating images with a name likepair-1.jpgwhere%tis the iterator, and%eis the extension
Creating Pix2Pix generated images
Now all that’s left is to pass these images through Pix2Pix and see what it comes up with. We can do that with the following command:
python pix2pix.py --mode test --input_dir [pair] --output_dir [gen] --checkpoint [model]
where:
[pair]is our image folder with the blank white image pairs we just created[gen]is the directory where we want Pix2Pix to generate new images[model]is our checkpoint directory where we first trained our model — i.e., the directory we want each pair to pass through before it is generated.
Let that run, and when it is complete your [gen] directory will be populated with all of the source, training, and generated images, along with an html file you can open to see all of these side-by-side.