Training drawings on how to be photos with Machine Learning
In this tutorial we'll use the massive library of sketches from Google's Quickdraw databse and train them on photos from the Internet Archive, turning drawings of fish to fish-photo-hybrids.
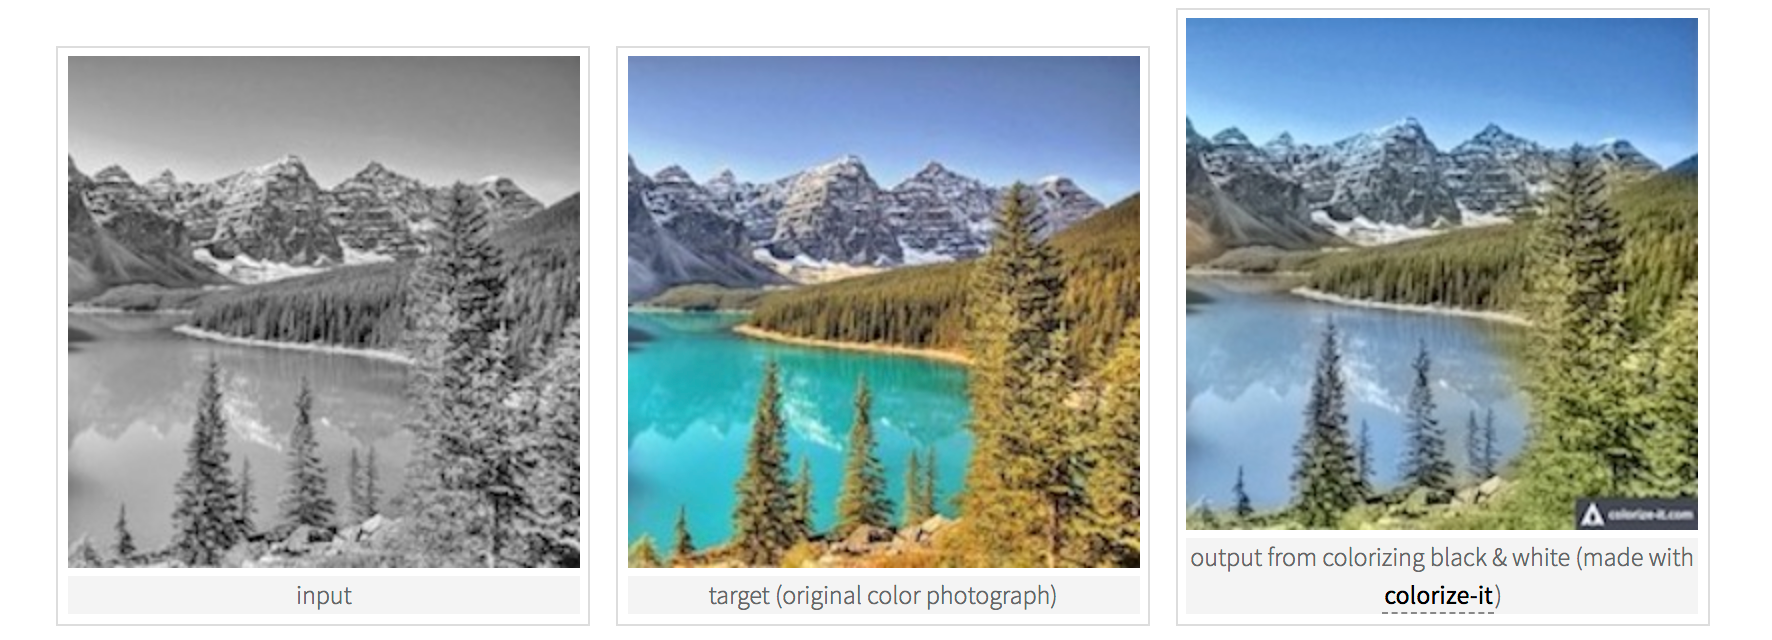
In a previous post I talked about how to use ImageMagick to convert images into a format that can be used
by Pix2Pix, a Tensorflow-based Machine Learning algorithm that can be trained to render photos of one style
into photos based on another style, for example, grayscale images to color images.
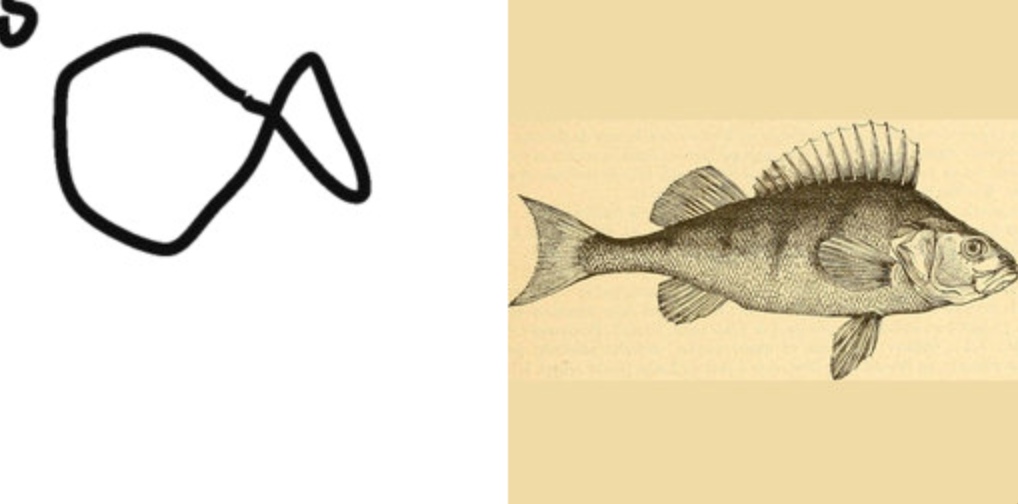
My first attempt at machine learning was to use images from Google’s Quick Draw Database, an open-source library of over 50 million crowd-sourced sketches of everyday objects:
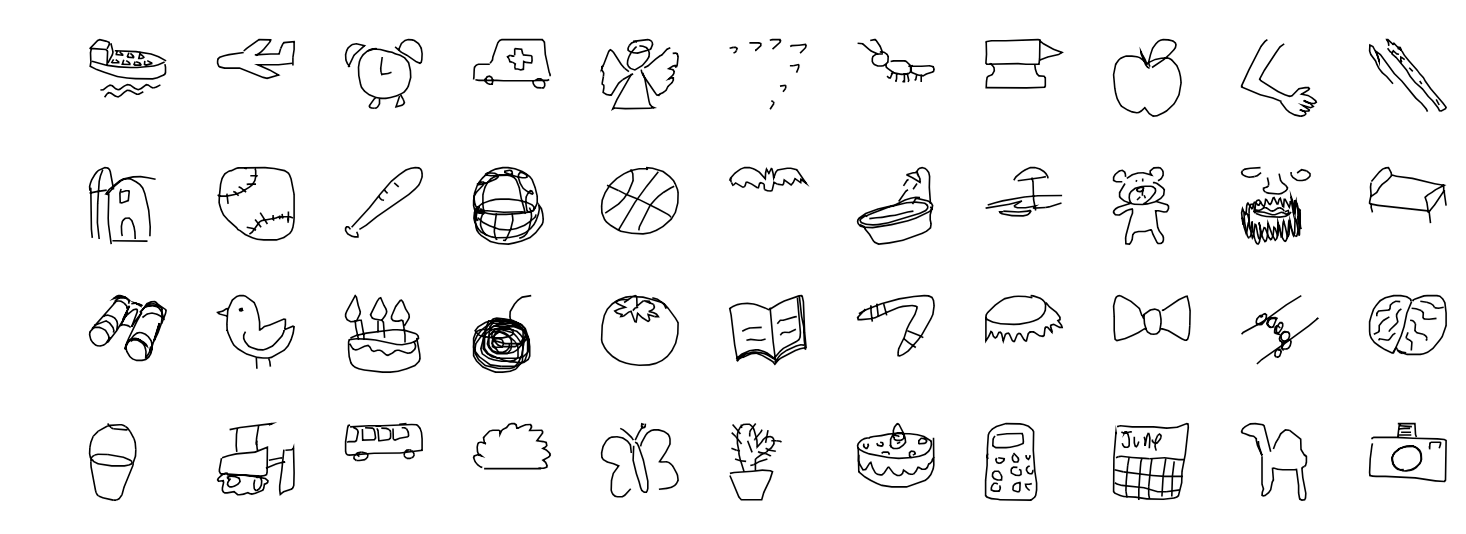
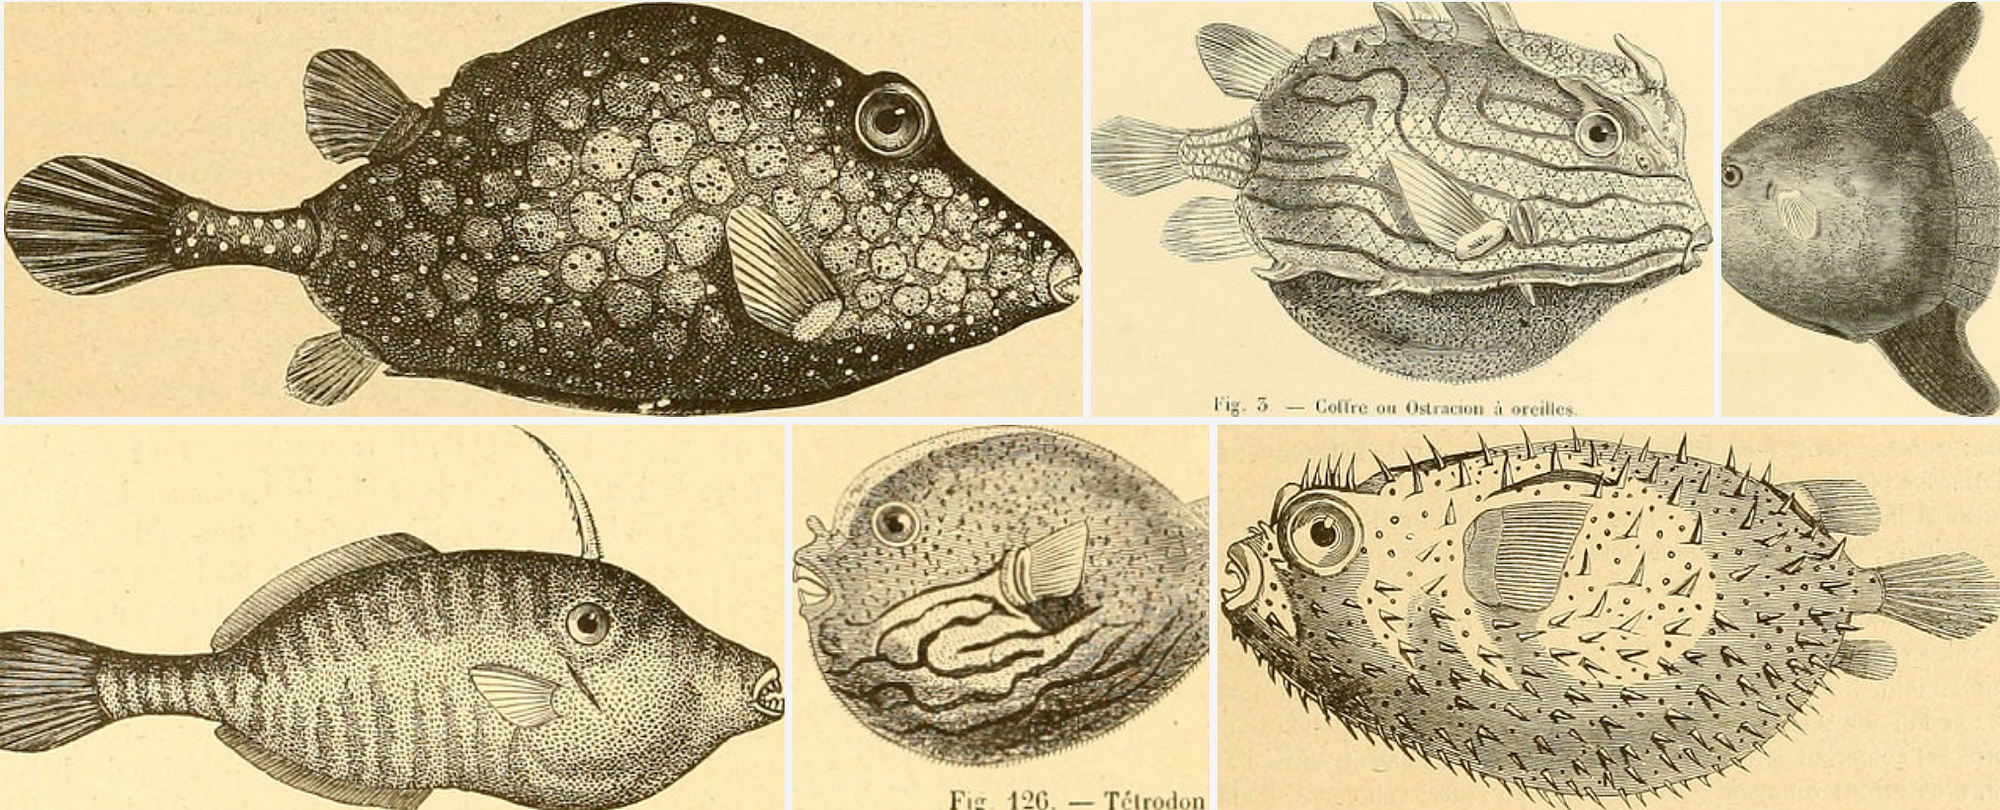
and try and convert them to illustrations of a style I found on the Internet Archive Flickr Set:
The quick draw database can be found here, and you can search for the dataset you want (in my case fish). Download it, and you’ll see you have a very large ndjson file, where rather than images, we have an array of coordinates representing each brush stroke a person took to make their drawing:

But what we want are images. I found a way to visualize this data by using the ndjson-cli tool from D3 creator Mike Bostock (found here), and some D3 sample code by Ian Johnson. Since D3 only understands json and not njdson, we first need to convert it. We do that by installing the njdson-cli , and converting our saved quickdraw dataset:
            npm install ndjson-cli -g
            cat [file].ndjson | ndjson-filter 'd.recognized == true | ndjson-reduce > [output].json
where [file] is the name of the quickdraw file you downloaded, and [output] is
the name of the converted file you want saved to your hard drive.
For my purposes, I didn’t want a huge dataset, so I just took the first few hundred results from the json file, and deleted the rest.
Next, we want to visualize what we saved in the browser. You can copy the code here:
and replace the output.json with the name of your json file.
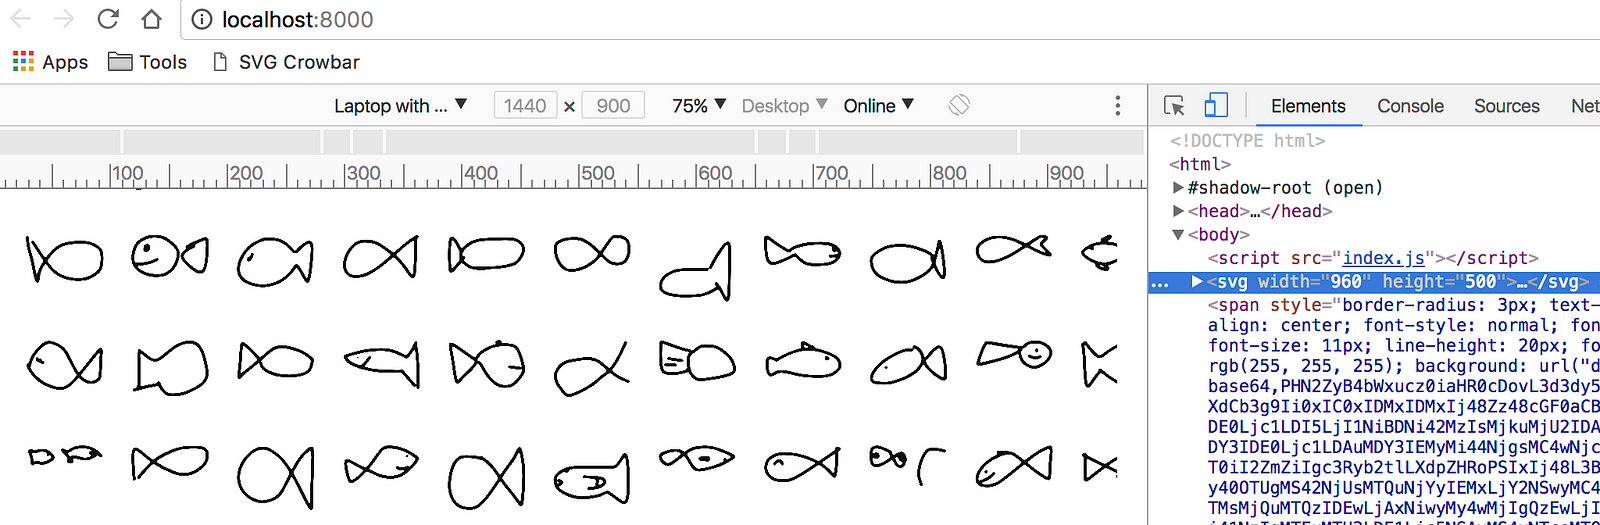
Then view it in your browser:
Now, to download this file as an image, we can just use our web inspector, and copy the SVG node into a
blank file, and save it as [output.svg] (or whatever you want to call it.
Now you can load this file in any program capable of viewing vector graphics, such as Illustrator:
You may need to do a few things to the file. My images were very small, and the stroke was very thick. So I had to select it, change the stroke to 1px, and then I resized the whole image so that each fish was about 256px in size, which is the size that Pix2Pix renders everything out as. Your images can be bigger, but it will just slow the processing time down — Pix2Pix (as far as I know) can only render out images at 256x256.
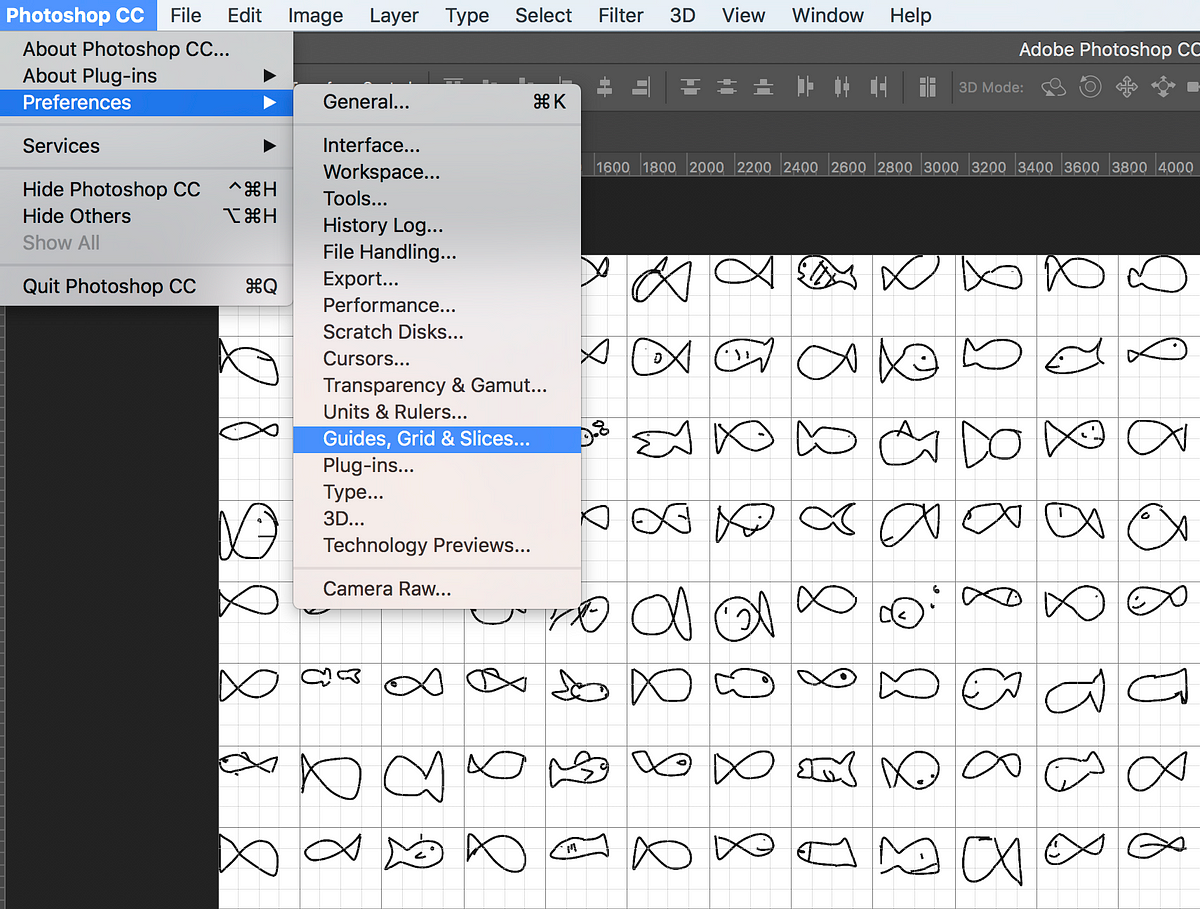
So now that we’ve done this, we need to slice this image up into individual images for each fish. So first
I need to know how big each slice needs to be. In Illustrator, I went to the
Settings > Guides > Grid and changed the Grid line every [blank] pixels until each
grid square could accurately contain a single fish, without that drawing crossing over the gridline (in
which case our drawing would be cropped off when we slice the image up.
Lastly, save the SVG as a GIF or JPG.
Now in order to programmatically slice up and save out all these images, we can use ImageMagick. Once it’s installed, run the following command from within the folder where you saved your image grid:
convert fish.gif -crop 30x19@ +repage +adjoin tiled/fish-%d.gifWhere fish.gif is the name of your file, 30x19 is the number of rows and columns
in your image grid, tiled/ is the directory you want to save the new images into, and
fish-%d.gif is the file name for each image (fish1.gif,fish2.gif, etc).
Once you’ve done this, you should resize the images. Paste this into the command line / terminal:
            for i in tiled/*.gif; do
                convert \
                    ${i} \
                    -resize 256x256 \
                    $(convert ${i} -format "sized/%t.%e" info:)
            done
where tiled/*.gif is the directory where you saved out all the images in the previous step,
256x256 is the image size, and sized/%t.%e is the directory you want the new,
resized images saved into, with %t being the iterator (1,2,3,etc), and %e being
the extension (.gif).
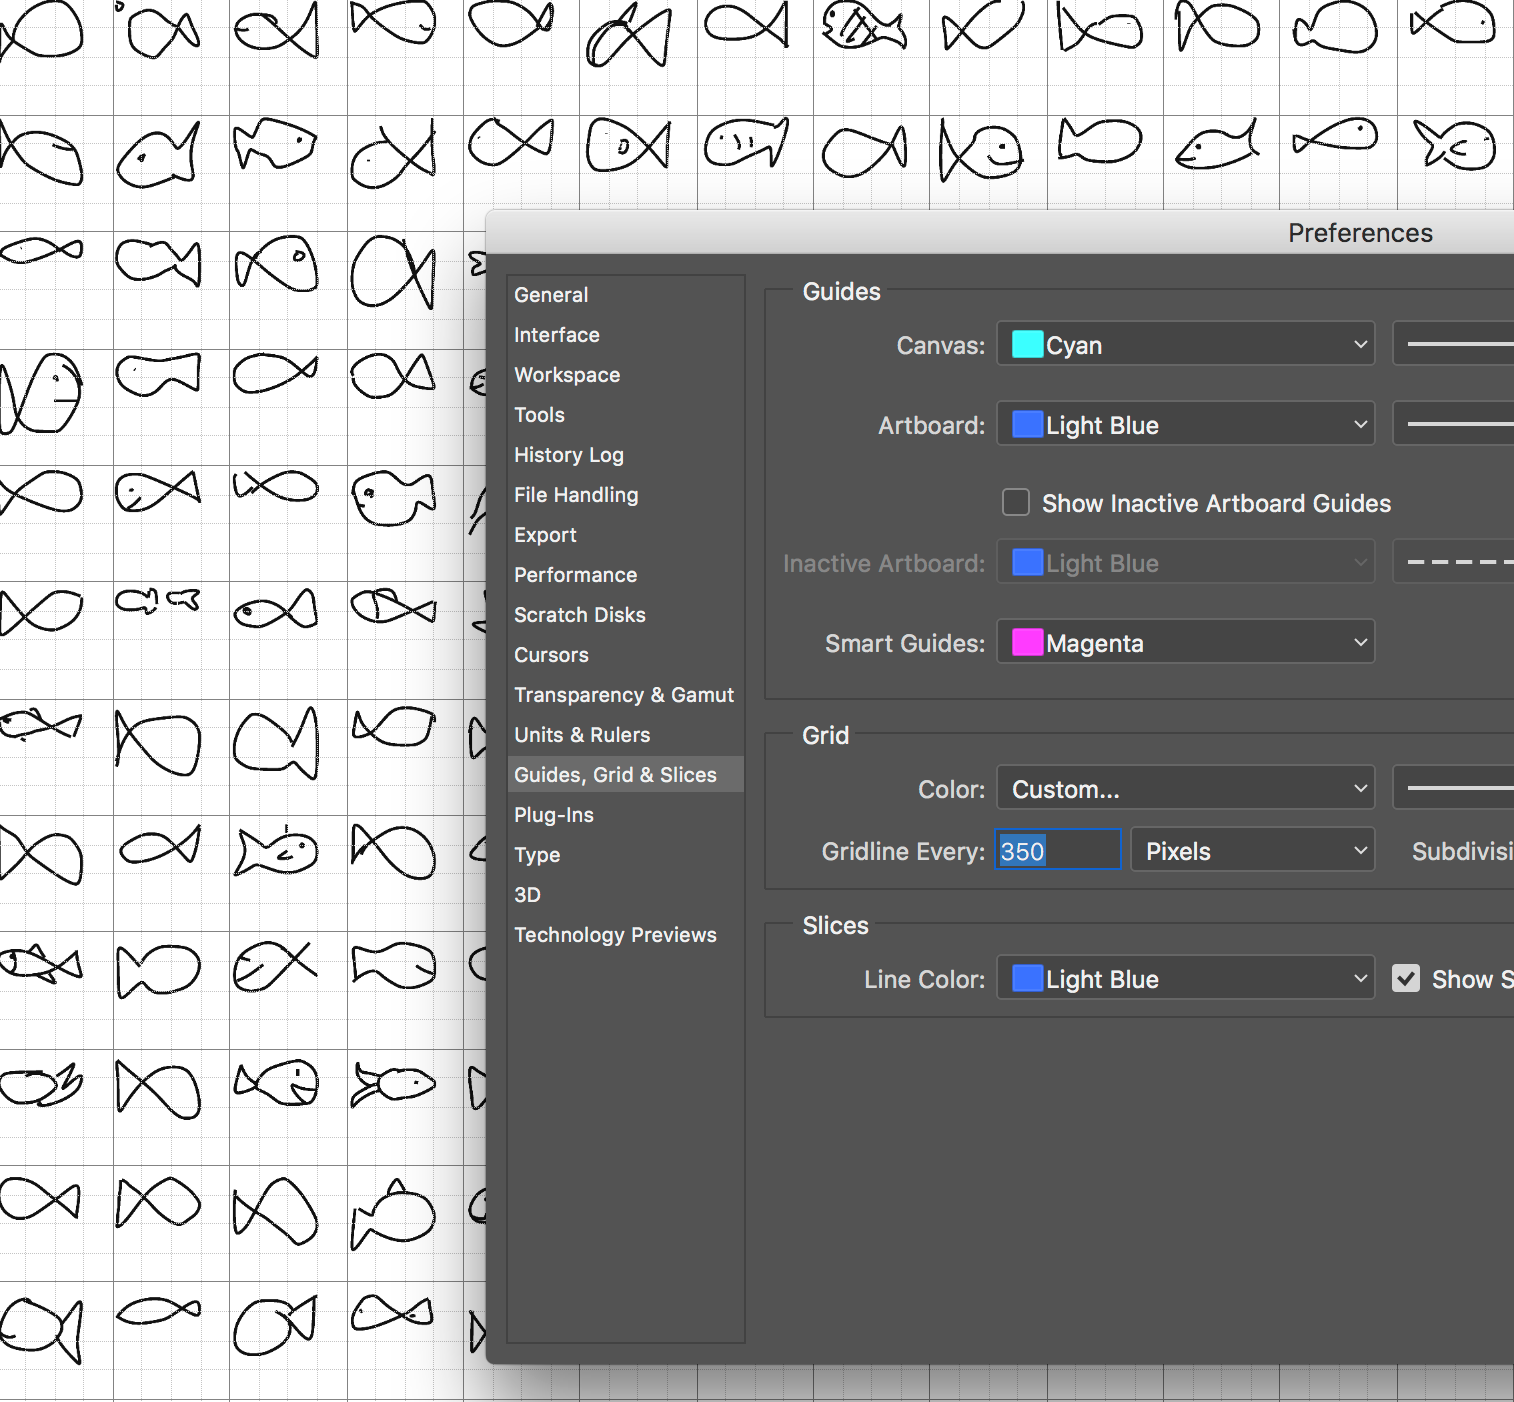
Now that we’ve got some images that we want to our machine learning model to convert, we need images to train our model on, so it knows what we want these drawings to end up looking like. I mentioned I’d be using the Internet Archive Flickr Set. If you head to that page, you can browse some really amazing illustrations of all sorts of things. I wanted to download some of the fish images, but I didn’t want to have to go one-by-one through them in flickr and manually download them. Luckily, there’s a number of Chrome Extensions which can automate image downloading.
The first one I could find that would actually work with Flickr was Image Downloader by Vlad Sabev.
Once it’s installed, you can browse the Internet Archive, and when you see some images you want, just click the extension icon, and you’ll be presented with a bunch of images you can download. Just select all the ones you want, and click download. Place these in a directory somewhere near the folder with all of our the drawings you just created in the previous steps.
Now that we have these, we need to make them square as well, so that they can be processed by Pix2Pix. Again we can use ImageMagick.
In my case, all of my images were 640px wide, but varied in height. So I wanted to just increase the height to 640px on each image, but keep each image’s aspect ratio — sort of the equivalent of Photoshop’s Canvas Size functionality. In order to do that, I wanted to just fill the extra space created with the background color of the image. So first, for each image we need to sample the background color, as each image is different. This command will help with that:
            for i in *.jpg; do
            c=$(convert ${i} -format "%[pixel:p{1,1}]" info:)
            convert \
                ${i} \
                -gravity center \
                -background "$c" \
                -extent 640x640 \
                $(convert ${i} -format "fish-%t.%e" info:)
            done
where *.jpg assumes you are running the ImageMagick commands from the directory where you
saved your Flickr images, c=$... will store the background color of each image in a variable
called c , and pixel:p{1,1} tells ImageMagick that we want to get the color of the
1st pixel at the top left corner of our image.
Once we have that, we then run the convertcommand again, expanding the image to 640x640 to make our images
square, and saving them out with a name of format fish-%t.%e (fish-1.jpg, fish-2.jpg, etc).
Now that these are squared, lets just size them down to 256x256 so they can be used in Pix2Pix:
for i in square/*.jpg; do
            convert \
                ${i} \
                -resize 256x256 \
                $(convert ${i} -format "sized/%t.%e" info:)
            done
where sized/ is the directory you want to save the resized images to, and square/
is the directory you ran the previous steps from.
Now we’ve got both source images and training images of size 256x256. Great! Pix2Pix will want us to combine these into a single side-by-side image, like so:
In order to achieve this, we can use ImageMagick’s montage command, which basically does the reverse of what we did early earlier — it takes sliced images, and combines them into a grid. For my part, I only saved out about 100 fish photos from the internet archive, so I’ll just create 100 montages:
            for i in {1..100}; do
                montage drawings/sized/fish-${i}.gif sized/fish-${i}.jpg -tile 2x1 -geometry 512x256+0+0 montage/fish-${i}.jpg
            done
where {1..100} is the range of items we want to loop through,
drawings/sized/fish-${i}.gif refers to the directory holding our resized fish drawing images we
created earlier, sized/fish-${i}.jpg refers to our resized fish illustrations from the Internet
archive, tile 2x1 means that we want our images side by side (2 rows by 1 column), with a
geometry 512x256+0+0 , meaning 256 pixels high, 512 pixels wide (256*2), with 0+0
padding around each image set (no horizontal or vertical padding). We’re saving everything out to the
montage/ directory as fish-${i}.jpg (fish1.jpg, fish2.jpg, etc).
Once that’s done, we can finally train our model! You’ll need to download Pix2Pix, which has some very specific requirements. You can follow the Machine Learning for Artists Guide by Gene Kogan here for more details, but essentially you’ll need to:
- Install CUDA by NVIDIA, which is a Computer Vision library for NVIDIA supported graphics cards
- Install CUDNNN, a library for CUDA specifically designed for Deep Neural Nets.
- Install Tensorflow, a Machine Learning library developed by engineers at Google.
- Install Pix2Pix for tensorflow, which is a github repo that you can simple clone or download, and place into a directory.
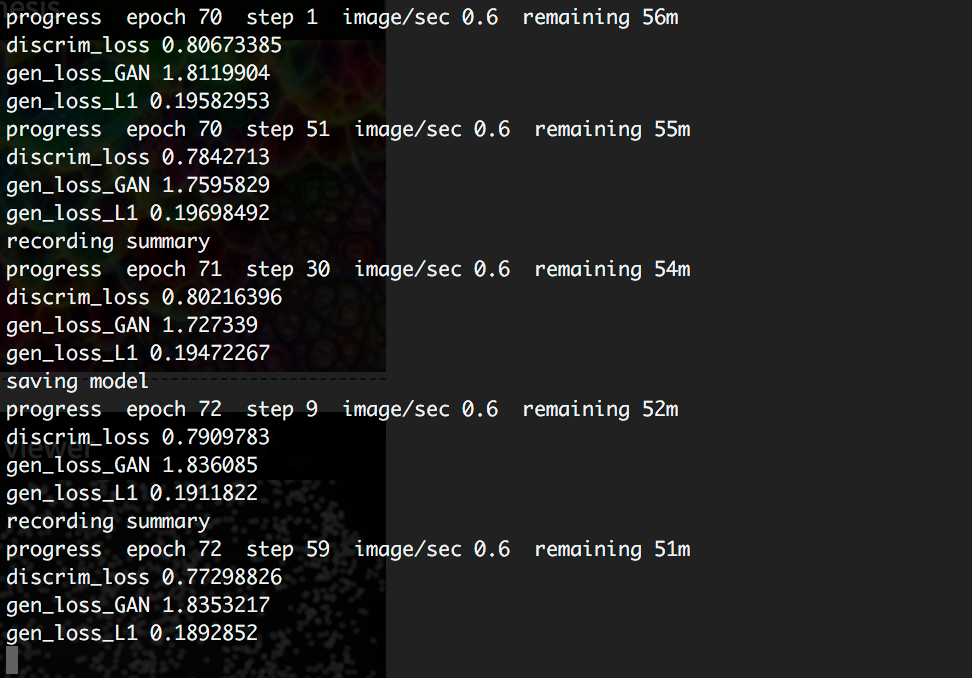
Whew! Once that’s all up and running, we can train it on our model. You’ll want to make sure that your image folder containing all of the montage images we created is now inside the directory holding the pix2pix.py file from the github repo so that we can more easily reference it. From there, let’s start the training. Heads up, this will take awhile (around 3 hours for me for 100 images through 100 epochs on an older MacBook Pro).
python pix2pix.py --mode train --input_dir fish/montage --output_dir fish/model --which_direction AtoB --max_epochs 100
Where fish/montage is the directory containing our montage images, fish/model is
the directory where we want to save our trained model, and — which_direction AtoB means we’ll
be converting the images on the left into images that look like the ones on the right. max_epochs means
we’ll run each image through the model 100 times for training.
In reality, you’d probably want many more images for proper training, and more epochs as well, but this will provide us a good glimpse into the capabilities, and most likely give us some weird and fun results.
When the model is fully trained, we’ll want to prep some drawings from the quick draw database that we can through our model to see what it dreams up. To prep them, we’ll just need the drawings on the left, and instead of using training images on the right, we just want blank white space. I’ll grab the next batch of 100 images from my drawings directory, and use montage again, this time as follows:
            for i in {101..200}; do
                convert drawings/sized/fish-${i}.gif -gravity west -background white -type truecolor -extent 512x256 train/fish-${i}.jpg
            done
where 101-200 is the batch of images I want (since 1-100 were used in training my model, we won’t reuse
them), drawings/sized/fish-${i}.gif represents the file location of each drawing (fish-1.gif,
fish-2.gif, etc), gravity-west means we’re anchoring the fish on the left, and creating the
white space on the right, truecolor converts the gif (a black and white indexed color image),
into an RGB jpg, and train/fish-${i}.jpg is the directory we want to save our images out to.

Now we can run these images through our model, and see what Pix2Pix comes up with:
python pix2pix.py --mode test --input_dir fish/train --output_dir fish/gen --checkpoint fish/model
where, again, we’re in the directory containing pix2pix.py , and fish/train is where we saved
all of our blank white montaged drawings out to, fish/gen is where we want to save our
generated images, and fish/model is the directory containing our trained model from earlier.
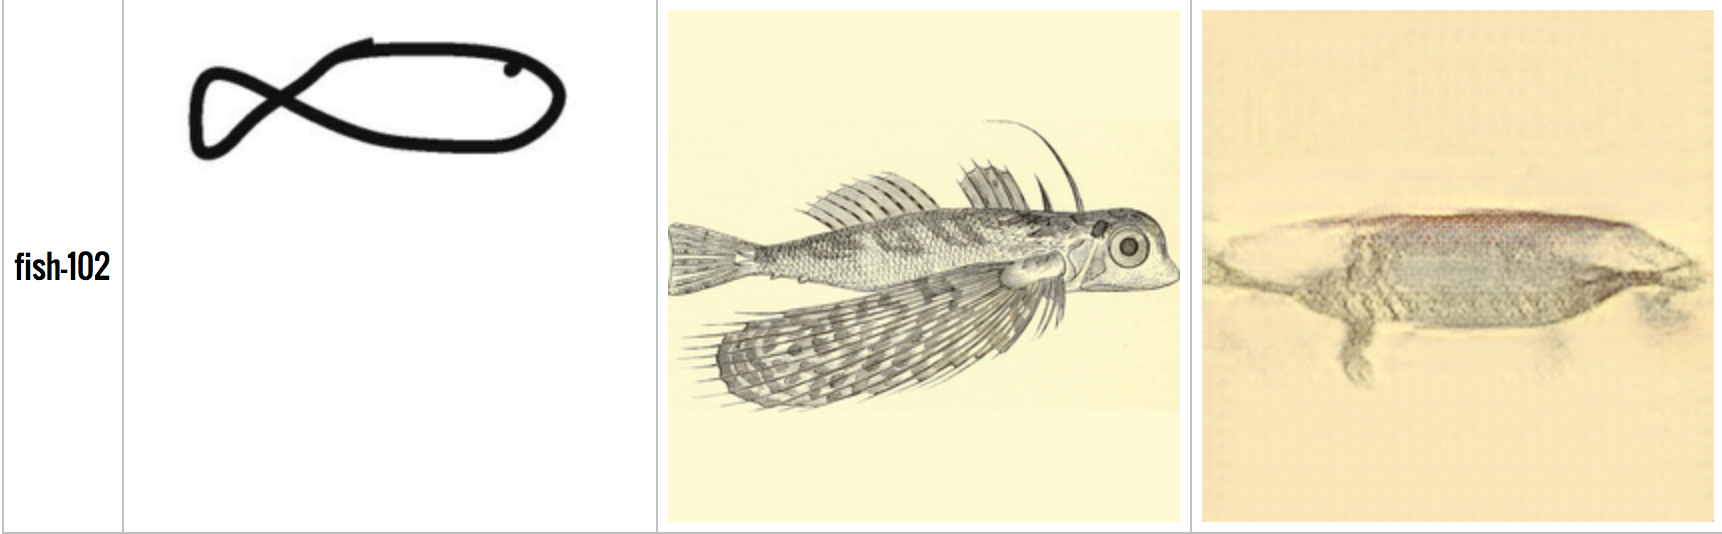
The result is predictably weird and pretty unpolished, but I think kind of cool. This was a fun first experiment for me, and I’m excited to play around more with Machine Learning and see what it’s capable of.
You can watch the video below as a companion to this article.