Loading custom fonts in Tumult Hype
Hype is a great tool if you’re looking for making motion heavy websites with a graphical interface. Adding fonts can be a bit confusing though. Here's how to make it happen.
As far as custom fonts go, Hype has instructions for how to do this, but they can be a little confusing. Here’s the steps for anyone who has had trouble with this:
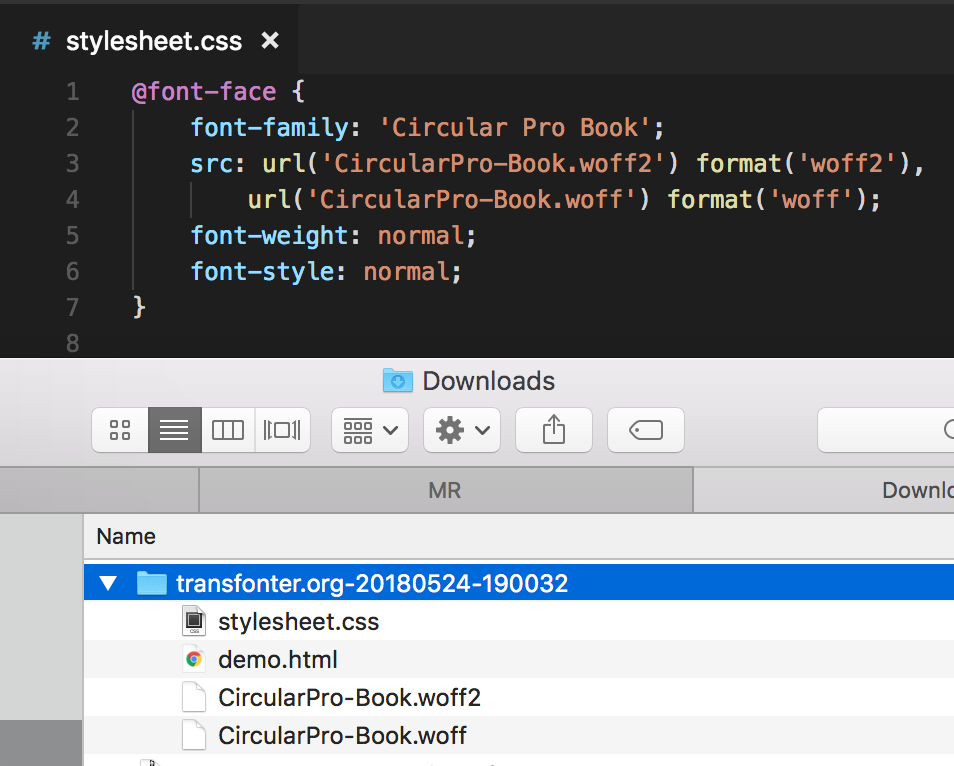
Take the fonts you plan to use and convert them to web fonts. You can go to transfonter (or other services, like Font Squirrel), and generate your web friendly font formats. Or, if you’ve purchased fonts, they usually include those formats, as well as a CSS file for how to include them in your site. These days, modern browsers just need WOFF/WOFF2. The zip file that Transfonter spits out a stylesheet.cssfile that can be useful for Hype:
In Hype, you need to add your fonts. Go to View > Resource Library. In that window, click the +button at the bottom, then Add File and find the font files Transfonter generated (woff / woff2). Then, click plus again, and go to Add Font... and choose Custom CSS as the source from the dropdown.
The Display Name field is whatever you want the font to be called in the Hype font menu.
The CSS Font-Family you can get from the CSS file Transfonter generated. In this case Circular Pro Book.
The Embedded Head HTML is just a modified version of the Transfonter CSS. First, start with an opening and closing style tag. Inbetween that, paste the transfonter CSS:
            <style>
@font-face {
font-family: 'Circular Pro Book';
src: url('CircularPro-Book.woff2') format('woff2'),
url('CircularPro-Book.woff') format('woff');
font-weight: normal;
font-style: normal;
}
</style>
Lastly, just add in the variable that points to the folder Hype will generate with all your font files, by putting it in the url declarations for each font file/format (the variable is ${resourcesFolderName}/).
              <style>
@font-face {
font-family: 'Circular Pro Book';
src: url('${resourcesFolderName}/CircularPro-Book.woff2') format('woff2'),
url('${resourcesFolderName}/CircularPro-Book.woff') format('woff');
font-weight: normal;
font-style: normal;
}
</style>
Now, you can make some text in your Hype file use the font you just added. Select some text, go to the Text Inspector menu, and choose your new font family from the list (Circular Pro Book, in this case).
When you export your file ( File > Export as HTML5 > Folder...) and click save, you can open the generated HTML file in your browser, and you should be able to see your web page using the new font.