Adding a Contentful CMS for websites created with Hype
This tutorial will show you how to use contentful to deliver CMS-driven content to your Hype-generated website.
Sign up for a free account with Contentful. With your contentful account, you can create all of the CMS fields you want your website to be populated with.
Create a new space. I’ve called mine hype.
Click on Content Model menu, and add a content type.I’ve just called mine Hype Data.
In this content model, click Add Field.
In this example, we’ll be adding a Number field called Current Mortgage Rate which will populate the Mortgage Rate text in the website we’re building in Hype.
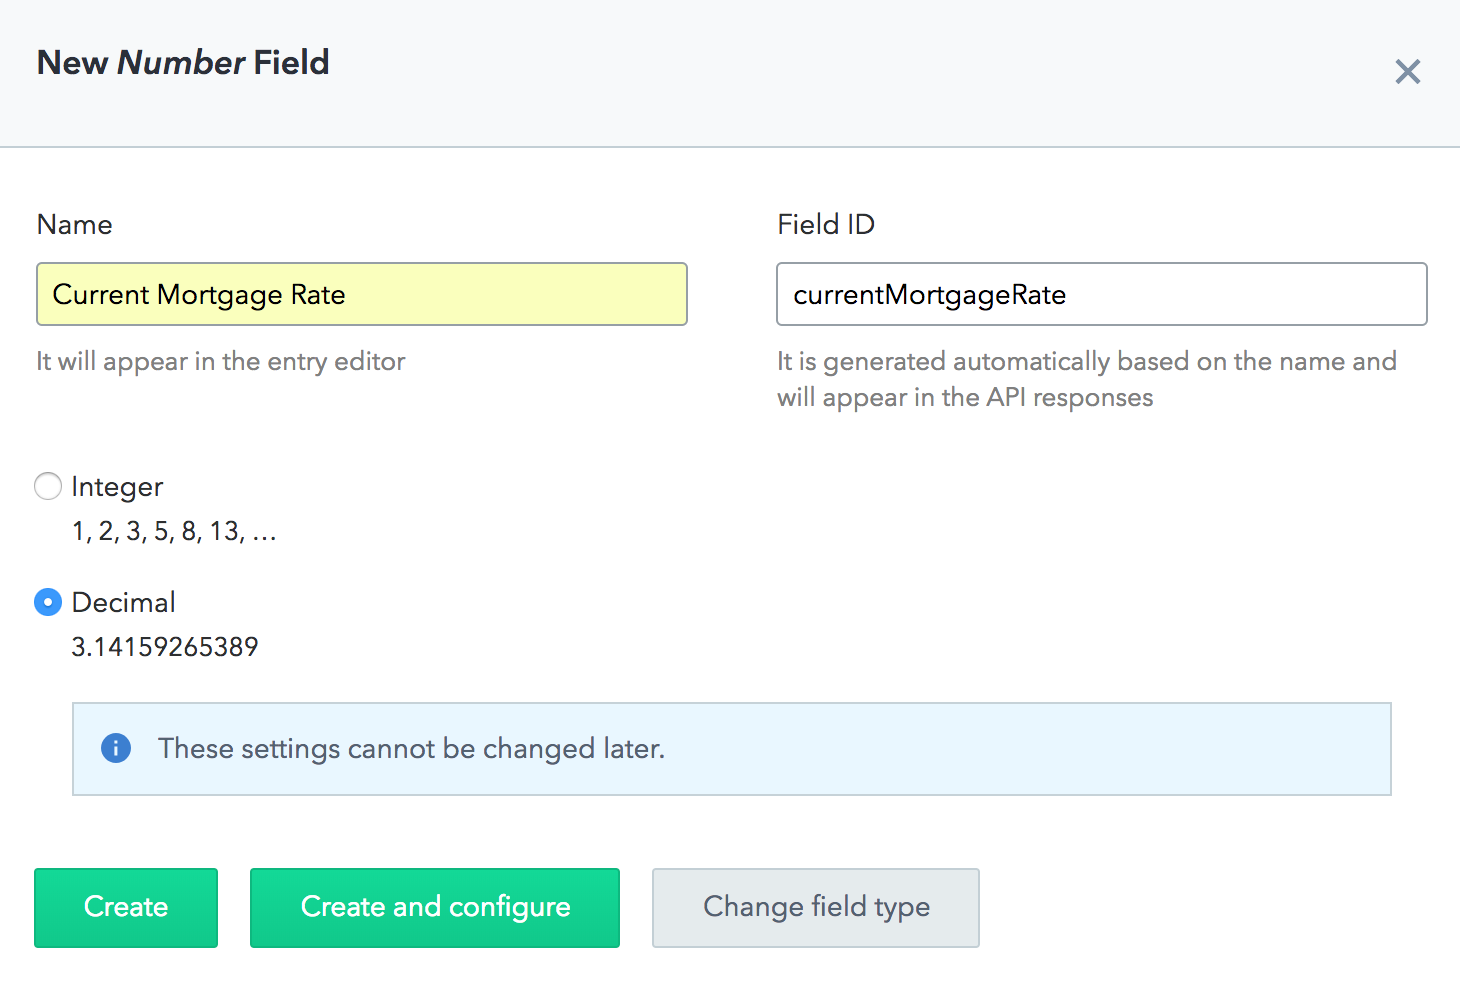
Now click on Content, and create your first Hype Data entry, with a Current Mortgage Rate of 4.5
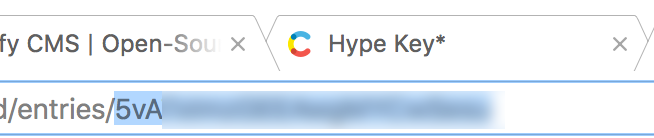
If we click on the Content menu item at the top of the page, we can see the content we just created.
In the URL of our web browser, we can see the ID for this entry. It’s the string of numbers and letters following the entries/ segment of the web address. Copy that entry ID. We’ll need it for Hype.
In the previous tutorial, we made our Hype text dynamic by giving it a unique class. You can follow that tutorial for more detail, but essentially all you need to do is select some text in Hype that you want to be editable by Contentful, and give it a Class Name. You can do that within Hype’s Identity Inspector window, in the Class Name field. I’ve called my field rate--current.
We need to add the contentful javascript library to Hype. Click here to open it in a browser, and save it somewhere on your computer (Cmd + S).
Now we need to add it to Hype, which we can do in the Resource Library (View > Resource Library ) by clicking the + icon and clicking Add File. Find the file you just saved. This will automatically add and load the Contentful Library when our webpage is generated and opens in the browser.
Next, we want to make a function that actually changes the text. Again within the Resource Library, hit the + and select Add Javascript Function. You’ll be taken to a new code window like this:

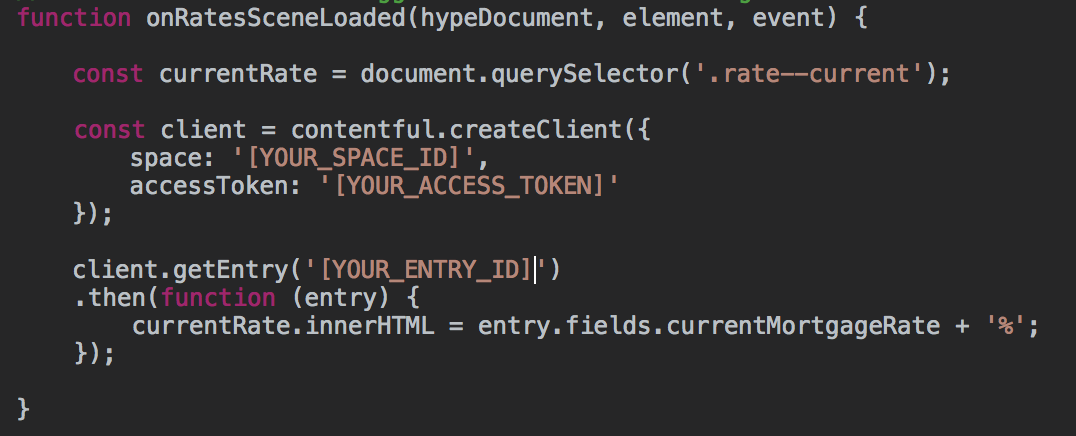
By default the function is called untitledFunction, but I’ve renamed mine to onRatesSceneLoaded.
We’re first going to set up an instance of Contentful within that function, so we can pull down our data. To make sure our data is secure, we need to pass the function our access credentials. You can find those in Contentful in the Space Settings > API Keys menu.
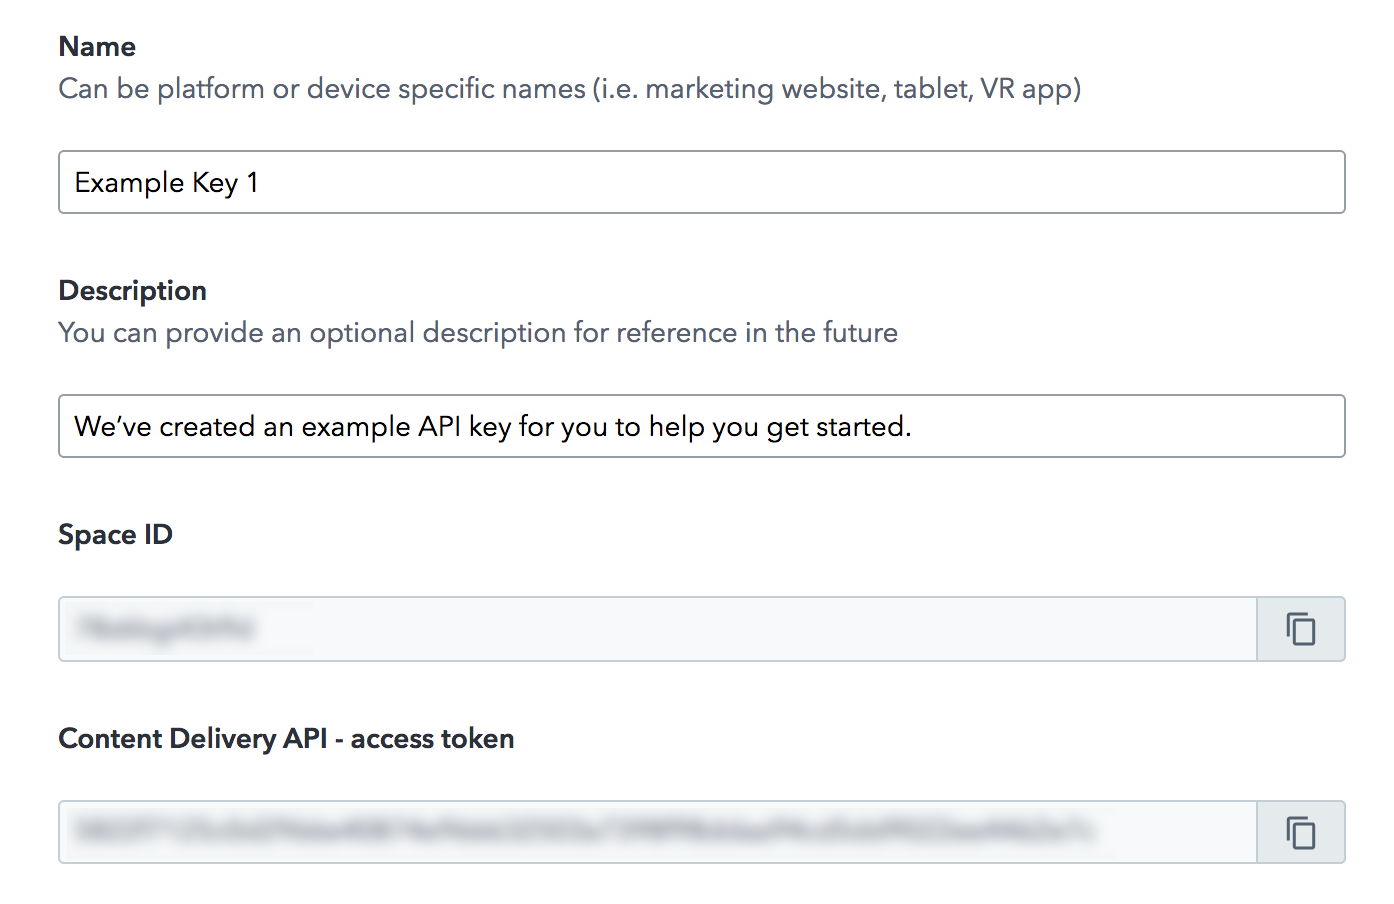
With the Space ID and the Delivery API — access token we can connect, using the following code:
            const client = contentful.createClient({
  space: '[YOUR_SPACE_ID]',
  accessToken: '[YOUR_ACCESS_TOKEN]'
});
replacing [YOUR_SPACE_ID] and [YOUR_ACCESS_TOKEN] with your actual credentials.
We also want to store a reference in javascript to the field we want to change. This code does that:
const currentRate = document.querySelector('.rate--current'); where .rate--current is the class name we assigned to our field earlier.
Lastly, we just need to get the data. We’ll first select the entry with our currentMortgageRate field, and then we’ll select that field itself:
            client.getEntry('[ENTRY_ID]')
.then(function (entry) {
  currentRate.innerHTML = entry.fields.currentMortgageRate + '%'; });
where [ENTRY_ID] is the ID we copied from the address bar in Contentful earlier.
So the whole code block looks something like this:
Lastly, we need to add an event to load the data itself into Hype, and populate that text field with the latest mortgage rate.
Go to the Scene Inspector, and scroll down to On Scene Load. For Action, choose Run Javascript, and in Function, choose the function name you just created (onRateSceneLoaded for me).
Now, when we export our web app (File > Export as HTML File > Folder) and open the resulting html file in our browser, we should see our text field populating with the rate we specified in Contentful. Whenever we want to update that rate, we can just go into contentful and change the value of the field we created.
So to sum it up, the steps are: Create a contentful account, set up a space in contentful, and populate that space with fields. Give our Hype content unique class names so we can target the right fields with the right data. Add the contentful javascript library to hype. Create a function which loads contentful, and populates our Hype text field with our Contentful data. Trigger that function when our Hype scene loads.
Once all the initial setup is done, adding additional dynamic content should be easy.